A floor lamp can fail quietly: the bulb flickers, the switch feels loose, or the light stays permanently on. Learning how to fix a broken floor lamp switch can restore useful lighting and prevent a small defect from becoming a serious electrical hazard. The repair usually involves identifying the switch type, disconnecting power, opening the socket or cord housing, and installing a compatible replacement. It is not complicated. It still deserves respect.
The risk is real. NFPA’s Home Structure Fires report for 2016–2020 attributes approximately 32,000 home fires annually to electrical distribution and lighting equipment. These fires caused about 470 civilian deaths, 1,100 injuries, and $1.3 billion in direct property damage. A worn lamp switch is not automatically dangerous, but heat, loose connections, damaged insulation, and overloaded outlets can create trouble. Small switch. Big risk.
This guide approaches the repair from a practical, safety-focused perspective. You will see how to recognize a faulty rotary, pull-chain, or inline switch, and how to check the cord before touching internal wires. The process follows common electrical-safety principles promoted by the U.S. Consumer Product Safety Commission and recognized testing organizations such as UL Solutions. However, product designs vary, and some instructions may be incomplete for older lamps. That limitation matters. Unplug the lamp, photograph each connection, and stop if you find scorched plastic, brittle insulation, exposed copper, or a damaged plug. In those cases, replacing the entire cord or consulting a qualified electrician may be wiser than forcing a quick repair.
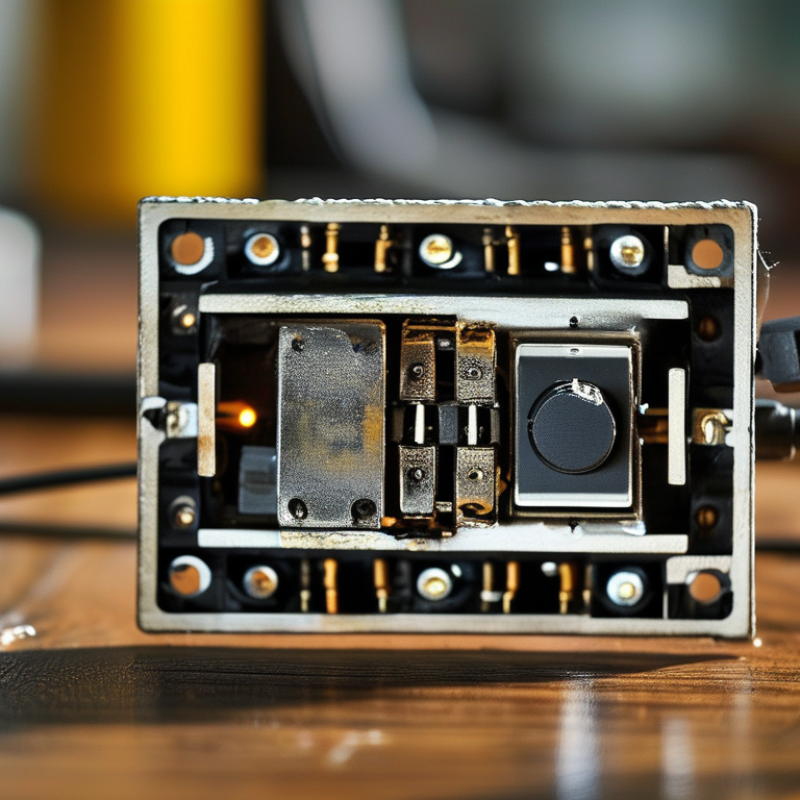
How to Fix a Broken Floor Lamp Switch Easily
A dead floor-lamp switch does not always mean the switch failed. The cord, plug, socket, or internal wire may be damaged. Begin with the CPSC electrical-safety guidance: turn the lamp off and unplug it from the wall before touching anything. Do not rely on the switch alone. A faulty switch can leave energized parts inside the housing. Check for a loose knob, cracked casing, melted plastic, scorch marks, buzzing, or a burnt smell. Stop immediately if you notice heat or smoke.
NFPA’s report on home fires involving electrical distribution and lighting equipment recorded an average of 32,620 fires, 470 deaths, and 1,100 injuries annually from 2016–2020. That makes a small lamp inspection worth taking seriously. With the plug removed, test the switch mechanically. If it feels gritty or moves without resistance, replacement may be reasonable. Use a replacement rated for the lamp’s voltage and current. Never bypass the switch with twisted wires. Never test exposed wiring while connected.
Remove the shade and bulb first. Photograph the wire positions before opening the socket. This simple step prevents avoidable mistakes. Still, many lamp sockets are cramped, and one misplaced wire can create a shock or fire hazard. If insulation is brittle, terminals are loose, or the switch is built into a sealed assembly, replace the assembly or ask a qualified electrician. My imperfect rule is simple: if the fault is not obvious unplugged, do not keep guessing.
A broken floor-lamp switch is usually replaceable, but the replacement must match the lamp’s electrical load. Choose a switch evaluated to UL 20, the safety standard for general-use snap switches. Check the lamp label for voltage and maximum wattage before removing anything. A 120-volt lamp rated at 150 watts draws about 1.25 amps. Select a switch rated for at least 125 volts and 1.25 amps, preferably with a clear safety margin. Never judge compatibility by appearance alone.
Use a replacement designed for the lamp’s cord type, conductor size, and switching method. Unplug the lamp completely. Do not rely on the wall switch. Inspect the cord for cracked insulation, flattened sections, or darkened copper. Replace damaged wiring instead of hiding it inside a new switch. The International Energy Agency reports that lighting uses roughly 15% of global electricity, so efficient lamps can reduce operating demand, but efficiency does not excuse an undersized switch. LED lamps usually draw less power, yet the fixture’s marked maximum rating still controls the repair. That detail is easy to miss.
I have seen switches installed without checking polarity. That is a poor shortcut. Connect the switched conductor correctly, secure every terminal, and keep bare copper fully enclosed. Test the lamp briefly after reassembly. Stop immediately if the switch feels warm, crackles, smells burnt, or operates loosely. A certified electrician should handle uncertain wiring, especially in older lamps. The label may be incomplete. That is where careful judgment matters.
| Check or Specification | Typical Value or Condition | How to Confirm It | Correct Matching Guidance | Safety Action |
|---|---|---|---|---|
| Supply voltage | 120 V AC or 230 V AC, depending on the lamp’s intended electrical system | Read the rating label on the lamp, plug, socket, or original switch | Choose a switch rated for the same voltage or a higher voltage within its approved rating | Do not install a 120 V-only switch on a 230 V circuit |
| Lamp wattage | Common floor-lamp loads include 40 W, 60 W, 100 W, and 150 W | Check the socket label and the maximum wattage printed on the lamp | The replacement switch must have a current rating that exceeds the lamp’s operating current | Never exceed the socket or fixture wattage limit, even when the switch has a higher rating |
| Operating current at 120 V | 40 W = 0.33 A; 60 W = 0.50 A; 100 W = 0.83 A; 150 W = 1.25 A | Calculate current with: watts ÷ volts | A switch rated at 3 A or more can generally handle these resistive loads, provided its voltage and load markings also match | LED drivers and other electronic loads can create inrush current; follow the switch’s stated load limits |
| Operating current at 230 V | 40 W = 0.17 A; 60 W = 0.26 A; 100 W = 0.43 A; 150 W = 0.65 A | Calculate current with: watts ÷ volts | Use a switch specifically rated for the 230 V AC system and the intended lamp load | Voltage compatibility is required even when the calculated current is low |
| Switch standard | UL 20-compliant general-use snap switch, where required by the electrical system and local rules | Inspect the switch body, packaging, and technical documentation for the applicable standard and electrical ratings | Match the switch’s marked voltage, amperage, load type, terminals, and switching function to the lamp | Do not rely on appearance alone; certification and rating markings must be legible and verifiable |
| Switch current rating | Common ratings include 3 A, 6 A, and 10 A, but the actual rating varies by model and load type | Read the amperage marking on the switch or its datasheet | Select a rating above the calculated lamp current and confirm that the rating applies to the intended AC load | Never substitute a lower-rated switch for the original switch |
| Lamp type | Incandescent, halogen, LED, or compact fluorescent | Identify the bulb technology and the maximum lamp wattage shown on the fixture | For LED or fluorescent lamps, verify compatibility with electronic-load or LED-load requirements | A switch suitable for incandescent loads may not automatically be suitable for every LED or electronic driver |
| Switch function | On/off, rotary, pull-chain, push-button, or three-way operation | Compare the number of terminals and the original switching behavior | Use the same function and terminal arrangement unless the wiring is professionally redesigned | Do not install a three-way switch as a simple two-terminal on/off switch without confirming the wiring diagram |
| Visible damage | Cracks, melted plastic, discoloration, loose terminals, arcing marks, or a burning odor | Unplug the lamp and inspect the switch and cord only after power is disconnected | Replace the switch if any heat or arcing damage is present; inspect nearby wire insulation as well | If the cord, plug, socket, or insulation is damaged, replace the damaged component before reuse |
| Basic replacement sequence | Unplug, document wiring, remove the old switch, transfer wires correctly, secure the new switch, and test | Photograph the original connections before disconnecting anything | Connect wires only according to the replacement switch diagram and preserve strain relief | Test the lamp only after the enclosure is closed and all exposed conductors are covered |
| When to stop | Unclear wiring, damaged insulation, repeated tripping, sparks, or a nonstandard electronic dimmer circuit | Stop if the fault cannot be identified by visual inspection and rating checks | Have a qualified electrician inspect the lamp or replace the complete switch assembly | Disconnect power immediately if smoke, persistent arcing, or overheating occurs |
How to Fix a Broken Floor Lamp Switch Easily
A broken floor lamp switch is often replaceable, but careful documentation matters more than speed. Unplug the lamp completely before touching its wiring. Remove the shade and bulb, then inspect the socket and cord for heat damage. Do not assume wire colors are correct. Older lamps may contain faded, altered, or confusing conductors.
Before removing the damaged switch, photograph every connection from several angles. Write down which wire connects to each terminal, including the hot and neutral sides. A polarized cord usually has a marked neutral conductor, while the unmarked conductor is typically hot. However, markings can disappear with age. Use a properly rated voltage tester only when the lamp is safely disconnected from power, and verify the circuit is dead. I once trusted a faded color mark and had to redo the connection. That mistake was avoidable.
Tips: Label each wire with small pieces of tape. Mark “hot,” “neutral,” and “switch terminal” clearly. Keep the old switch nearby for comparison. Choose a replacement with the same electrical rating and matching terminal layout. Tighten connections firmly, but do not crush the wire. Exposed copper should not extend beyond the terminal. After assembly, check for loose parts, pinched insulation, or a warm plug. If polarity is uncertain, insulation is damaged, or the lamp trips protection, stop and ask a qualified electrician. A simple repair should not become a hidden shock hazard.
A broken floor lamp switch can often be replaced with basic hand tools. Before touching the socket, unplug the lamp completely. Do not rely on the wall switch alone. Check the existing switch for its voltage and ampere markings. The replacement must be rated for 125 V and must meet or exceed the lamp’s current requirement. A lower rating can create excessive heat and a serious fire risk.
Estimate the lamp’s current by dividing watts by volts. For example, a 100-watt bulb at 125 volts draws about 0.8 amperes. Choose a replacement switch rated above that figure.
Remove the shade, bulb, and socket cover carefully. Take a clear photo of the wire positions before disconnecting anything. I once assumed the neutral wire was obvious, but that shortcut nearly caused a wiring mistake. Slow down.
Attach each wire to the matching terminal, then tighten the screws firmly. Loose connections may spark or heat during use. Keep bare copper fully under the terminal. Do not crush the insulation.
Reassemble the socket and test the switch while standing clear. Stop immediately if you notice smoke, buzzing, heat, or a burning smell. A damaged cord, cracked socket, or uncertain wire connection requires qualified electrical help. Check the rating again before plugging the lamp back in.
How to Fix a Broken Floor Lamp Switch Easily
A faulty floor lamp switch may be simple to replace, but testing matters more than speed. Unplug the lamp and remove the bulb before opening the switch housing. Photograph the wire positions, because memory can be unreliable. Inspect the insulation for cuts, scorching, or loose copper strands. Damaged wiring needs replacement, not just a new switch.
Set a multimeter to continuity or the lowest resistance range. Disconnect the switch wires before testing. With the switch off, the meter should show no continuity. With the switch on, it should show continuity and a low resistance reading. The exact numbers may vary slightly. Never test continuity on an energized lamp. That mistake can damage the meter or cause electric shock. I once trusted a click without checking the meter, and the switch still had an internal fault.
Reattach each wire securely, keeping bare copper fully under its terminal. Tighten screws firmly, but do not crush the conductor. Check that the strain relief holds the cord without cutting it. Reassemble the housing before restoring power. Then install the bulb and test the lamp from a dry location. Look for steady light, normal switch action, unusual heat, buzzing, or a burning smell. Stop immediately if any warning appears. A switch that works once is not automatically safe. If the continuity reading remains confusing, or the wiring shows heat damage, ask a qualified electrician to inspect the lamp.
: Choose a switch rated for at least 125 volts. Its ampere rating must meet or exceed the lamp’s current.
Divide watts by volts. A 100-watt bulb at 125 volts uses about 0.8 amperes.
LED bulbs usually use less power. However, the lamp’s marked maximum rating still controls the repair.
Unplug the lamp completely. Remove the bulb and shade. Inspect the cord for cracks, flattening, or darkened copper.
Photograph the wire positions before disconnecting them. Check polarity carefully, because wire appearance can mislead you.
Disconnect the switch wires first. With the switch off, continuity should stop. With it on, continuity should appear.
No. A click does not prove safe operation. I once trusted that sound and missed an internal fault.
Stop if you notice smoke, buzzing, unusual heat, sparks, or a burning smell. Do not keep testing.
Seek qualified help when wiring is uncertain, insulation is damaged, or the socket shows heat damage. Older lamps deserve extra caution.
Learning how to fix a broken floor lamp switch starts with safety. Turn off and unplug the lamp before inspecting it, and confirm that the switch is truly faulty rather than the bulb, cord, or socket. Choose a replacement switch designed for the lamp’s voltage and wattage, preferably one that meets the applicable safety standard for cord switches. Before removing the damaged switch, take clear notes or photographs of the wire positions and polarity so every connection can be restored correctly.
Install the new switch only within its stated voltage and ampere limits, securing each wire firmly and keeping exposed conductors fully covered. Check continuity with a suitable tester before reassembling the lamp, then test the switch while watching for heat, sparks, flickering, or unusual odors. If any wiring is brittle, damaged, or unclear, stop and have the lamp inspected by a qualified electrician. This careful process makes the repair safer and helps prevent electrical shock, short circuits, or fire.

PureRay Light