Why Use Track Lighting to Create a Focal Point?
A well-placed beam can make a plain room feel intentional. Track lighting directs attention toward artwork, shelving, a dining table, or textured walls. It also offers flexibility when furniture changes. This makes it useful in homes, galleries, retail spaces, and hospitality interiors.
The practical question is how to create a focal point with track lighting without producing glare or harsh shadows. Lighting designer and author Randall Whitehead describes lighting as “the jewelry of architecture.” His observation explains why beam direction matters. A narrow spotlight can highlight a ceramic vase. A wider beam can reveal an entire bookcase. The result should guide the eye, not compete with the room.
Begin by choosing one feature that deserves attention. Position the track slightly forward from the wall, then aim adjustable heads at a 30-degree angle when possible. This reduces reflected glare and gives objects gentle dimension. Use warm-white lamps around 2700K to 3000K for living areas. Higher color temperatures may make cozy materials appear cold.
The first aiming plan is rarely perfect. That is normal. Stand across the room and check the light from seated eye level. Move each head a few degrees. Watch for bright spots on glass, television screens, or polished stone. A dimmer adds control during evening use. Professional advice remains valuable, especially when ceiling height, heat, wiring, or artwork protection matters. A focal point should feel discovered, not forced.
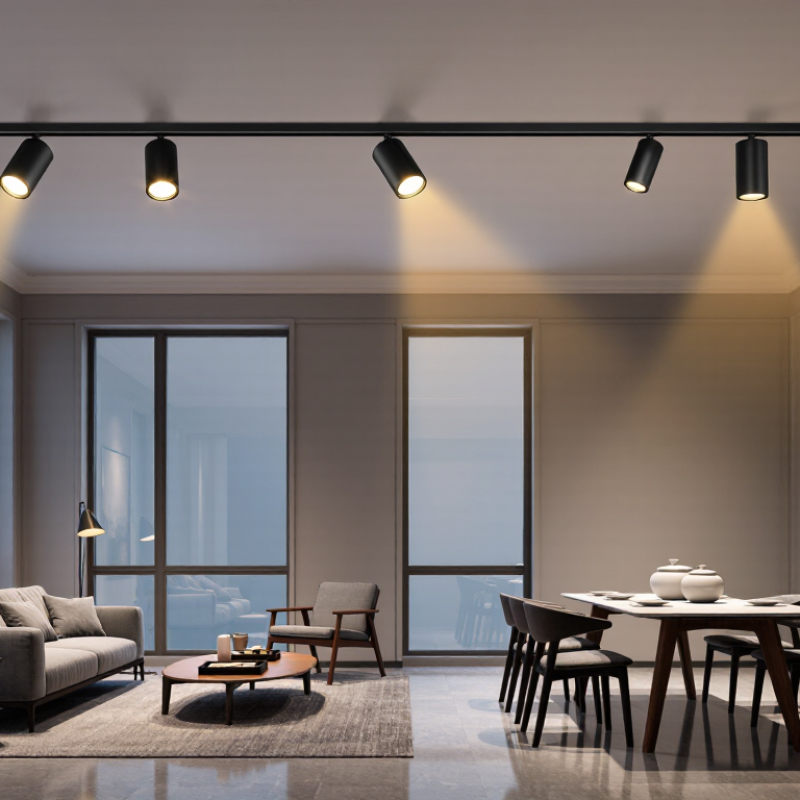
A focal point is the feature people notice first: a textured stone wall, a reading chair, or artwork above a console. Decide what deserves attention before choosing track lighting. Stand at the room entrance and note the natural sightline. Then measure the target and its distance from the track. Aiming lights without a clear target can make the whole room feel busy. It happens.
Select a track system that fits the ceiling, layout, and lighting task. Heads that swivel and tilt help direct beams onto a vertical surface or tabletop; adjustable spacing makes later changes easier. Check the beam angle, output, dimming compatibility, and color temperature against the target material. A narrow beam can sharpen a small artwork, while a wider beam suits a broad wall. Test the aim after dark, since daylight can hide glare and uneven patches. The U.S. Department of Energy reports that LED lighting uses at least 75% less energy and lasts up to 25 times longer than incandescent lighting. That comparison supports choosing efficient LED track heads, though actual results depend on use and product specifications. One caveat: even a good system can look harsh if the beam lands directly in someone’s eyes.
| Planning Dimension | What It Means | Practical Guidance | Example |
|---|---|---|---|
| Focal point | The main feature in a space that draws attention first and helps organize the visual composition. | Choose one clear subject before selecting fixtures. A focal point may be artwork, a display, a textured wall, or a dining table. | A framed artwork becomes the primary visual feature in a living room. |
| Why use track lighting? | Track-mounted heads can be aimed at selected features, and their positions can often be adjusted along the track. | Use directional light to make the subject brighter than its surroundings without adding a separate ceiling outlet for every head. | A track with adjustable heads can serve several pieces in a gallery-style display. |
| Select the focal feature | The size, location, surface, and viewing distance of the subject affect how it should be illuminated. | Check for reflective glass, delicate materials, nearby windows, and likely sightlines. Avoid aiming light where it causes distracting glare. | For glazed artwork, adjust the fixture angle to reduce reflections from the viewer’s position. |
| Beam spread | Beam angle describes how broadly a spotlight distributes light; narrower beams concentrate light, while wider beams cover more area. | Match the beam spread to the subject’s size and distance. Confirm the fixture’s beam specification because available angles vary by product. | A narrow beam may suit a small object; a broader beam may be more suitable for a large wall feature. |
| Aiming and placement | The position and direction of each head determine where the brightest area falls and how shadows appear. | Aim toward the subject rather than directly into normal viewing positions. Test the light after installation and make adjustments as needed. | Positioning a head to graze a textured wall can emphasize its surface relief. |
| Track configuration | Track systems differ in electrical and mechanical design; components must be compatible within the selected system. | Check track and head compatibility, mounting requirements, electrical capacity, and whether the layout needs straight or connected sections before purchase. | A straight run may work for a single display wall; a multi-section layout can serve several zones. |
| Light quality | Color temperature affects the appearance of a space, while color rendering affects how accurately colors appear under the light. | Consider the room’s existing lighting and the subject’s colors. Compare product specifications and, where possible, test a sample in the space. | Artwork and merchandise may benefit from lighting with strong color rendering. |
| Layered lighting | Accent lighting works alongside ambient and task lighting rather than replacing them. | Keep enough general illumination for safe movement and add task lighting where activities require it. Use dimming only when the fixtures and controls support it. | Use track heads for a feature wall, with separate ambient light for the rest of the room. |
| Final check | A successful focal point is noticeable without creating harsh contrast, glare, or unwanted shadows. | View the scene from common seating and walking positions. Re-aim heads, adjust brightness, or change the beam spread if the subject is not clearly emphasized. | Check the result in both daytime and evening conditions. |
Pick one feature people notice first, such as a textured stone wall, reading chair, or artwork above a console. Check the sightline from the room entrance.
Match the system to your ceiling, layout, and lighting task. Swiveling heads, adjustable spacing, and dimming compatibility make later changes easier.
A narrow beam can emphasize a small artwork. A wider beam suits a broad wall. Test the aim after dark to spot glare and uneven patches.
A CRI of 90 or higher generally shows colors more faithfully. A deep red vase may look richer, though CRI alone cannot guarantee accurate color.
Check the R9 rating if reds matter. Compare samples in your own room; warm light may turn a white canvas yellow, while cooler light can feel stark.
Avoid aiming a fixture toward eye level or glossy surfaces. Sit where people will sit, then rotate the head or widen the beam if reflections feel sharp.
Try a second fixture from a different angle if one narrow beam leaves a dark patch. Add it only when the shadow distracts.
Check the setup at night and adjust one head at a time. Live with the result for a day; awkward glare can be easy to miss during a quick check.
Track lighting offers a flexible way to draw attention to a chosen feature, such as artwork, a textured wall, or a display. To understand how to create a focal point with track lighting, first decide what should stand out and select a track system that lets you position and adjust the fixtures to suit the space. Choose narrow 10°–20° beam angles for concentrated spots, or wider 25°–40° beams to illuminate a broader area.
Balance the accent lighting with the room’s ambient light, aiming for an accent-to-ambient illuminance ratio of about 3:1 so the feature is noticeable without overwhelming the space. Lamps with a CRI of 90 or higher can render colors more accurately. Finally, aim and adjust each fixture carefully to reduce glare and harsh shadows, creating a clear, comfortable focal point.

 PureRay Light